Tuesday, June 15, 2010

My Review of EF 24-70mm f2.8L USM Zoom Lens

Originally submitted at OneCall

This new lens does what many pros thought couldn't be done - replace the previous L-series 28-70 f/2.8 lens with something even better. Extended coverage to an ultra-wide angle 24mm makes it ideal for digital as well as film shooters, and the optics are even better than before with two Aspheric...


Great Everyday Lens!!!

By PhotoCroaker from Baltimore, MD on 6/15/2010


5out of 5

Pros: Fast / accurate auto-focus, Easily Interchangeable, Consistent Output, Nice Bokeh, Strong Construction, Durable

Cons: Heavy

Best Uses: Weddings/Events, Indoors/Low Light, Landscape/Scenery

Describe Yourself: Semi-pro Photographer

I had to send back the first copy I received due to massive focusing and color defects, but the second copy made me believe in this lens.
The bokeh is butter-smooth and the colors (especially greens and blues) are as vivid as they can be. I used to shoot RAW all the time so that I could touch up the photographs in post-editing, but I don't need to do it anymore with this lens. Now I shoot JPEG 99% of the time.
Be aware that this is a tank...heavy as they can make them. But you can get used to it with time. The 2.8 is worth it in lowlight indoor situations.

(legalese)

Monday, May 31, 2010

Fort Ontario, New York, Pics

Here are a few photographs I took this Memorial Day Weekend at Fort Ontario in Oswego, New York. Great fun learning about the fort and its illustrious history and I hope to visit one day when the artifacts are back in their original place where they belong. I wrote an article about my first visit to the fort here. These pictures were taken a week after the visit mentioned in the article, and as soon as I post the article that goes with these, I will post a link here as well. Hope you enjoy them. 


Saturday, April 10, 2010

Trying new lens

Trying out a new lens in jpeg and no editing. Cloudy day and a cold breeze. I was very lousy with the settings, so forgive me. 

Thursday, April 1, 2010

Sunset

Canon 500D (Rebel T1i) with EF-S 55-250mm IS @116mm 1/125s F/16 ISO 400
Being without a filter, wider aperture lens, a tripod, and a camera without low-noise, high ISO performance, I still couldn't let this sunset go without attempting to capture it.

For this type of shot, you really need to do two things; use a tripod and use the Manual setting where you set your own shutter speed and aperture. Using just shutter priority or aperture priority will make your shot either underexposed or overexposed, and a tripod eliminates camera shake.

I didn't have a tripod, so I did the best I could in the situation. However, I knew I played it safe, shot RAW and simulated the Polarizer filter in Photoshop using Channels.

Here's what the original image looked like:

You can notice the biggest difference in the highlights and the elimination of the haze. 

You can find the simple polarizer filter Photoshop tutorial here.

Sunday, March 28, 2010

Eyes

I apologize for the long delay, but between going out to shoot and staying in to write and edit those select shots I am including in a couple of upcoming works, I haven't had much time to share some tips on here...so, for that I apologize.

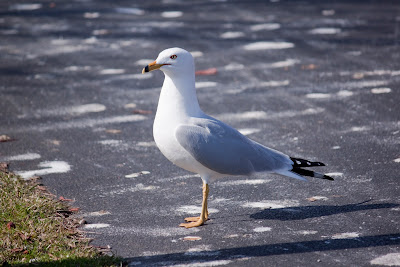
Today I want to point out the importance of making your subjects eyes clear and how Photoshop, or Lightroom, can help you. Rule one in animal photography is to have the eyes in focus and clear...as beady as you can make them...but sometimes the light situation or an off exposure will make your pictures come with darkened, unclear eyes. Notice I'm not blaming the lenses since there isn't much we can do about that at the moment because even those with the sharpest lenses do come up with photographs with darkened eyes. So, without further ado, let's see the differences...

Canon 500D (Rebel T1i) with EF-S 55-250mm IS @200mm 1/640s F/5.6 ISO 100

You can click on the image to enlarge it and you will see the eye still somewhat dark and unattractive. Now, I have not adjusted the exposure or any other setting, but I want to stress the importance of shooting RAW especially as a beginner with less than good lenses or spot-on exposure settings. 
Now let's take a look at this one.


Click on the picture to enlarge it and see if there you notice the difference. I did increase the exposure, but I also used the Adjustment Brush in Camera Raw to focus on the eye and increase its contrast, clarity, and exposure. To up the color, I increased saturation all the way and a little on the brightness, too. That's the good thing about the Adjustment Brush, I could select and isolate the eye and work on it without altering the rest of the picture.
Now, let's take look at another photograph.

Canon 500D (Rebel T1i) with EF-S 55-250mm IS @250mm 1/640s F/7.1 ISO 100

For this set, everything is the same except for the eye and all that was needed to bring out its beauty was an extra isolated touching up using the Adjustment Brush in Camera Raw. You can see how its color contrast well with the rest of the picture and how it livens up the bird and the photograph in general. 


To end it all, here's a little something I made using this image to go along with today's subjects. Enjoy and, remember, to focus on the eye.